 This is the last card I had to come up with for this event. I really hope the girls like it. I was inkspired by my upline Marsha. She sent me our monthly meeting on DVD (how cool is that by the way) and she did a pocket card on it, and I thought, perfect, I am going to do one of those for super Saturday!!!
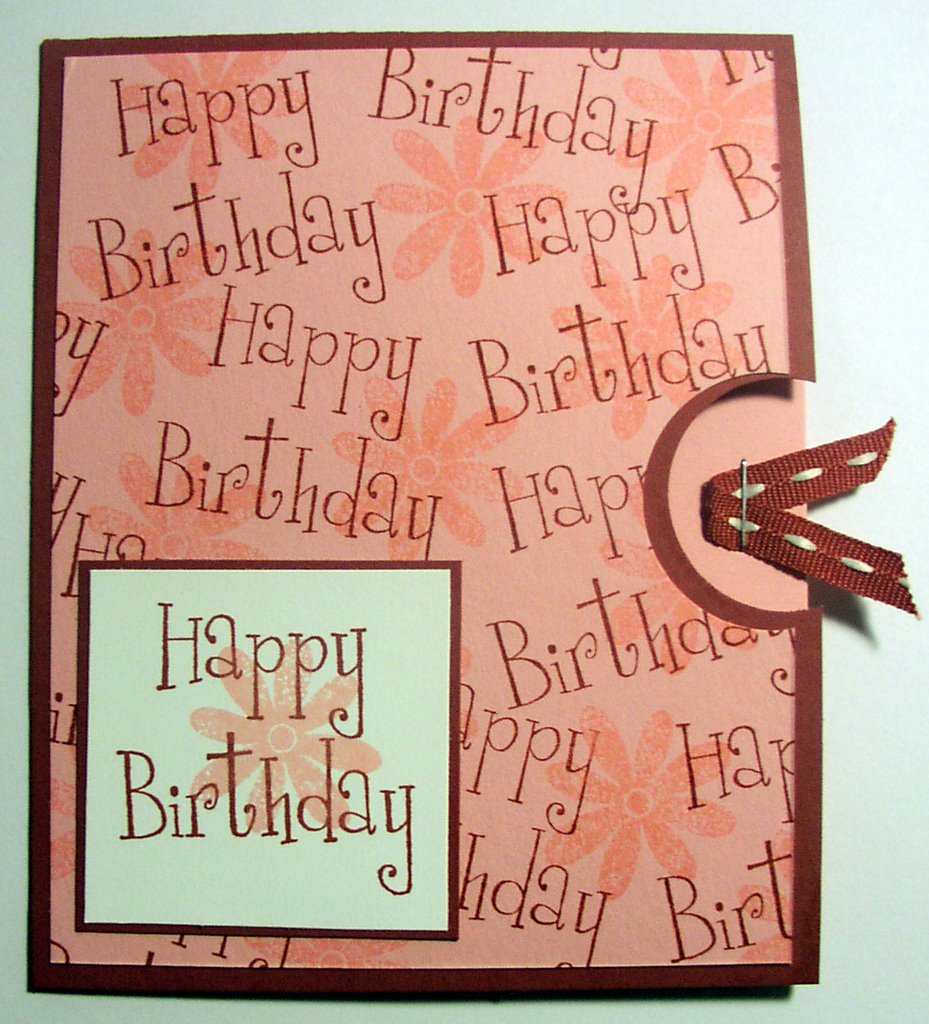
You measure the cardstock 11 x 4 1/4 -- you then score the cardstock at 5 1/4 and 10.5 and a bit (as Marsha would say) *wink* Then you fold and use terrifically tacky tape, or SU sticky strip (same stuff) and put it together. This card is done in cranberry crisp and pretty in pink ink. I stamped the pretty in pink cardstock with the same tone for the flowers. The flowers came from SU "All Through the Year." Then I stamped Happy Birthday over in cranberry crisp trying to avoid as much trapped space as possible. If I found a space I had some trapped area-- I simply stamped another pink flower. Simple right? I punched the pink with the larger SU circle punch, and then layered it on the cranberry crisp background and punched it with the smaller of the two punches by SU to create the double layered pull area.
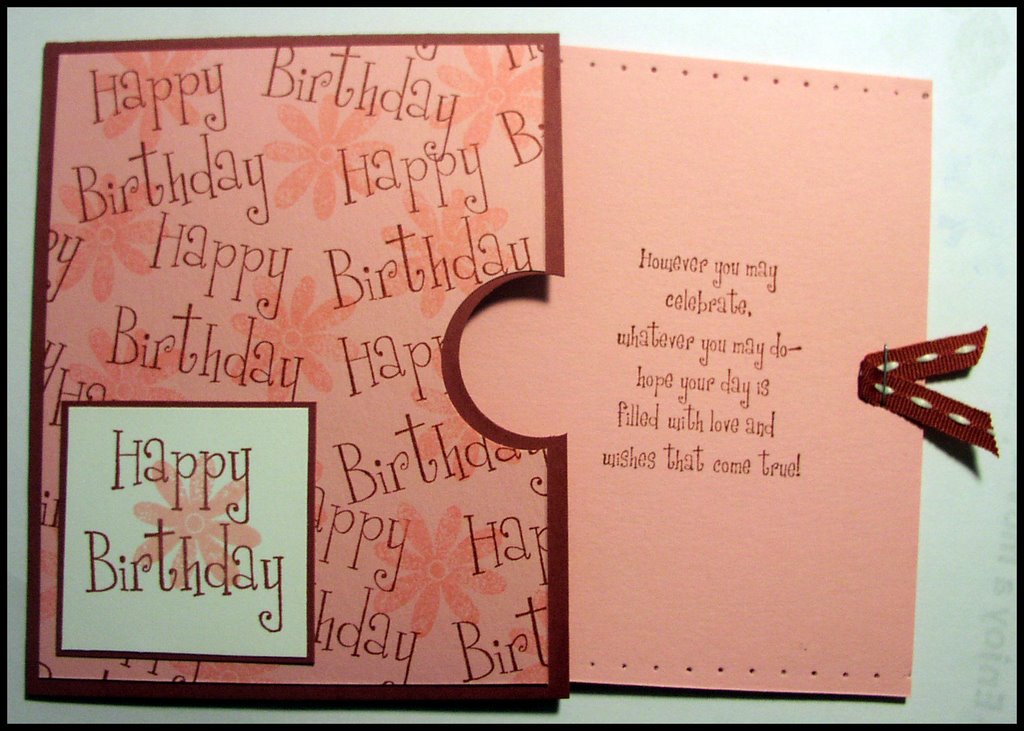 On the inside of the card -- the paper measures approximately 4x5. I pierced the top and bottom. Then I stamped the sentiment from SU "Cheery Chat" for birthdays in cranberry crisp, and then I added the ribbon -- stapled on in the pull out area. Okay, off to bed now, I had to be done before I leave for church tomorrow morning and knew I would never be able to get to it with kids to bathe, and dress in the morning, so I stayed up way past my bedtime. Sweet dreams!!!
SMALL UPDATE: I took the cards in to church today and it turns out that they just want the Christmas card and they do not want the others. I am kind of sad. Also, they are going to give me $20 for supply. It is a good thing that I feel generous since that is not gonna cover the total costs. So, this card will get sent out to a friend who is having a birthday soon!!!
Comments