 So this month for Jody in our swaps, I decided to do all things Halloween. With the exception of one project, they are all Halloween related. Some of the awesome ideas came from my upline Marsha. I had so much fun making all this stuff.
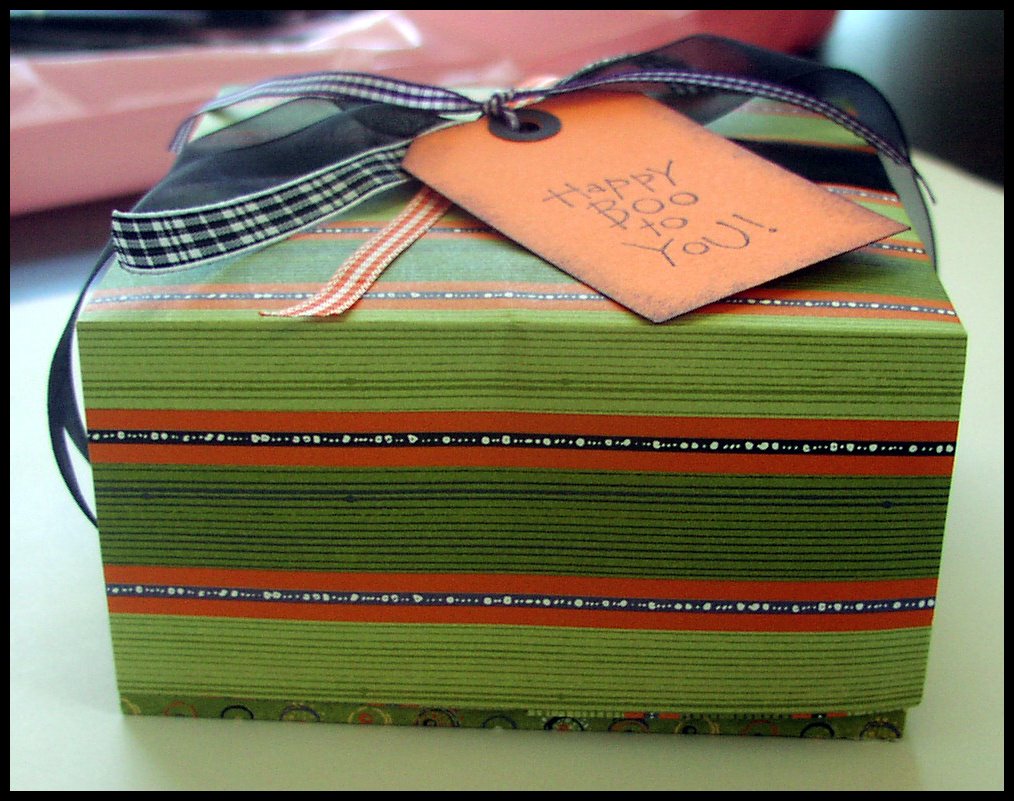
 The first item is just a simple box. I used paper cut to 10x10 and I scored at 2.5 inches on each side. I used SU designer series paper. The bottom was the same, only just trimmed down slightly. I filled it with Mike and Ikes (an entire Halloween goodies bag full of them) and then tied it with a big black ribbon around it. I added other ribbons and a "Happy Boo to You" tag which was just a basic tag made using the SU tag corner punch, and sponging on the edges. I also added a black circle at the top of the tag to give it a finished look.
 This second project was a pop up surprise card -- and I used pictures from our trip to El Paso to visit with Jody from July. I thought it would be a good memory to keep. You can do this type of card with all sorts of themes and ideas though -- sports, christmas, birthdays -- just replace the popped up item to suit the occasion.
  The view above is the inside of the card. The dimensions are 5.5 x 11 and then you score it at 4 1/4 and 8.5. To create the pop up, you mark at 1.5 away from the center line on either side, and down the center line. Then you create a score line and fold. It is really not hard at all. For the outside, you just fold the flap over -- secure with a paper clip of some kind. Really easy.
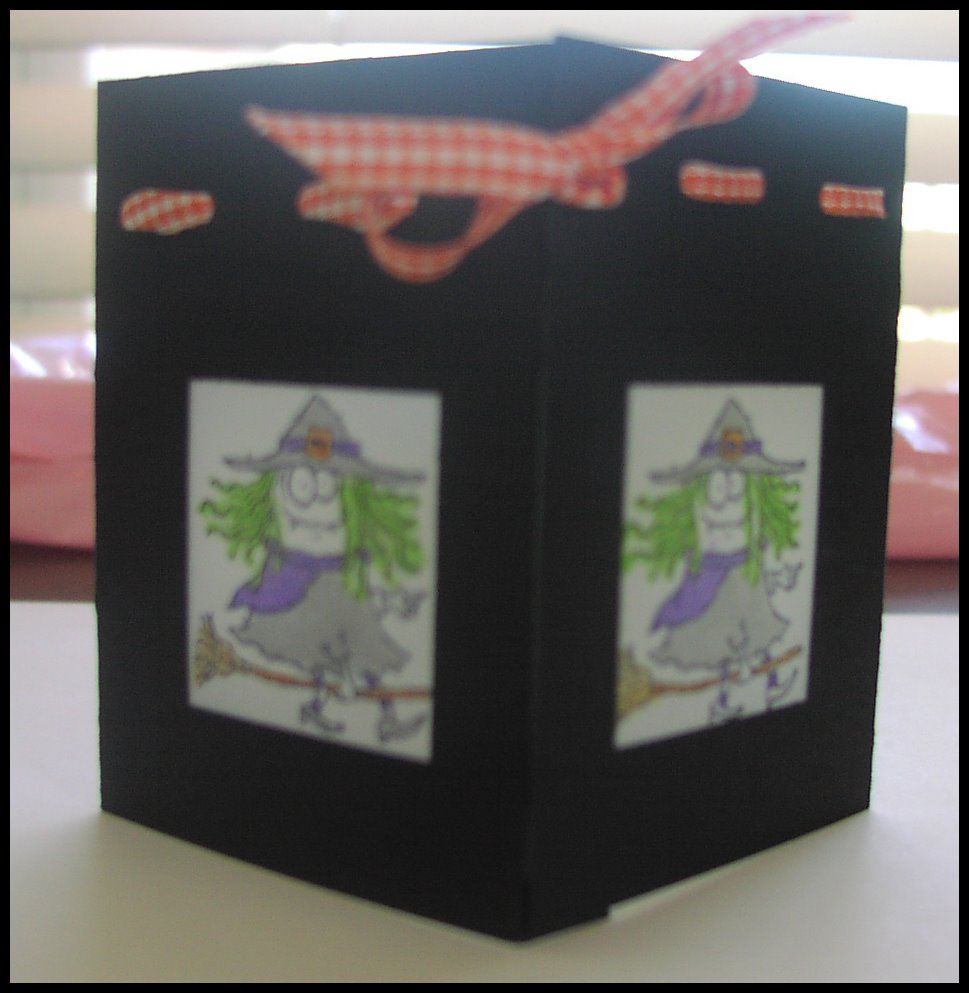 The next project was a simple paper tea light lantern. (sorry about how fuzzy the picture is -- I took it, and then sent the package off to Jody so I have no way to make it better). I used SU "Booglie Eyes" and vellum to create this simple project. It is just a matter of measuring the paper, scoring, punching the holes, coloring on the vellum and sticking it all together. Simple. I punched 5 holes on each side at the top to "sew" the ribbon through. I really like the effect it adds. Oh, and a quick tip for getting the color on the vellum to be more vibrant is to color both sides. It really helps when you light the tea light and the glow shows through. You can find directions for this by looking in the forums or gallery on splitcoaststampers. Also, use Staz on on the vellum to stamp.
 The next creation was a post it note holder, pen, and cello bag of lifesavers all matching. A little gift set you could call it.
I used SU "Cheesecloth" on the background -- tone on tone using Only Orange ink and paper. The jack-o-lantern is from SU "Carved and Candlelit" and the black dot accents were done using a black gel pen. The sentiment "Happy Halloween" is from SU "All Around Argyle" hostess set. It was quick and easy to do. I showed a friend, Carissa, how to make these, and since I had them on hand, I put it in Jody's box.
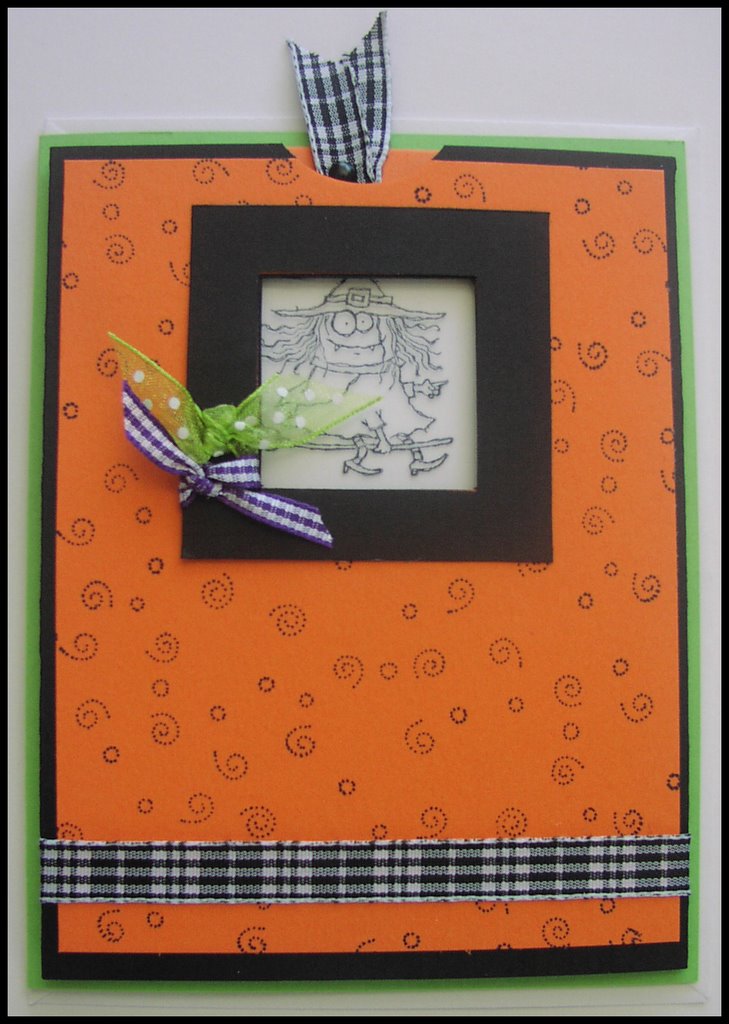
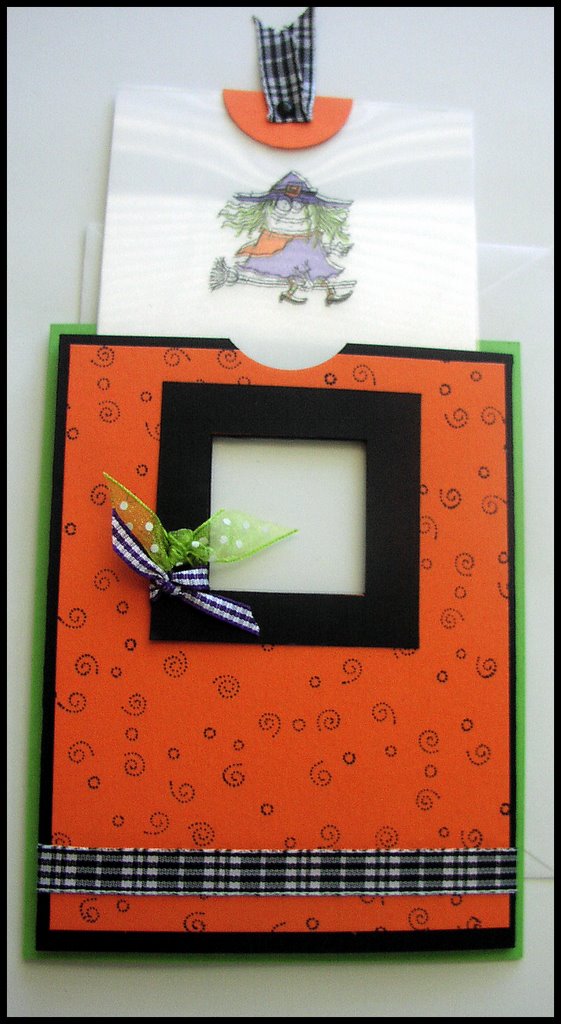 The final thing I made for Jody was a magic card. I had never attempted one of these before, so it actually took me some time to figure it out and get the dimensions looking right and stuff. Splitcoast has a good tutorial, but at one point on that I got confused even. Thank heavens for the pictures in the tutorial - they helped me out a lot. Here is the finished product of the magic card.
I used the witch from Booglie Eyes. I also used the SU square punch instead of a coluzzle cutter (I don't have one of those) and I think this card turned out cute, but the photographs are kinda blurry. Sorry about that. You should try a magic card though, they are fun!!! I will have to make one again soon.
Comments