 So I was a little late on sending this month (so what's new?) Seriously, that is why I cannot be on a design team for anywhere, I have issues with deadlines. I don't mind being early or late, but rarely on time.
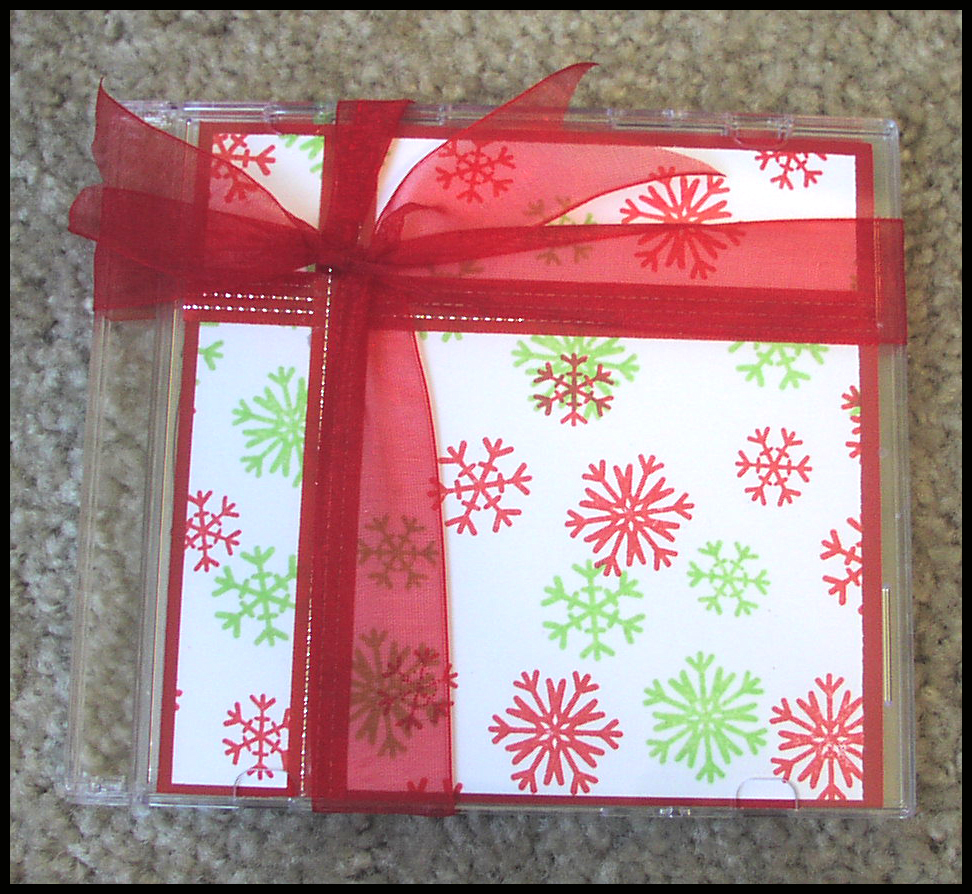
The first thing I made for Miss Jody, was some CD's of awesome Christmas music I have collected. I dressed them up all pretty and I think they turned out cute. I used that Michael's snowflake stamp -- which has proven to be a favorite, in spite of its $1 cost. Seriously, I hear about people stocking up on $1 stamps and never using them, but I have to say, that is not me. I love them all -- all stamps deserve a little love!!!
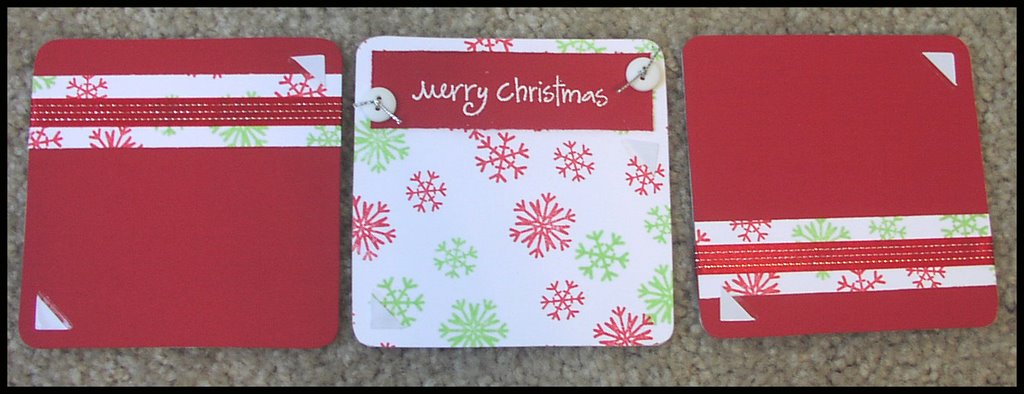
This second project is three panels of a coaster frame. Yes, I just had to get in on that coaster deal on SCS. I mean, how cool are blank coasters. As usual I did not go over the top though, and I just got 50. I like them. I did add hinges in between so this little frame can stand on its own. The photo corners are in place and ready for Jody to add adorable Christmas pictures of her three adorable kiddies.
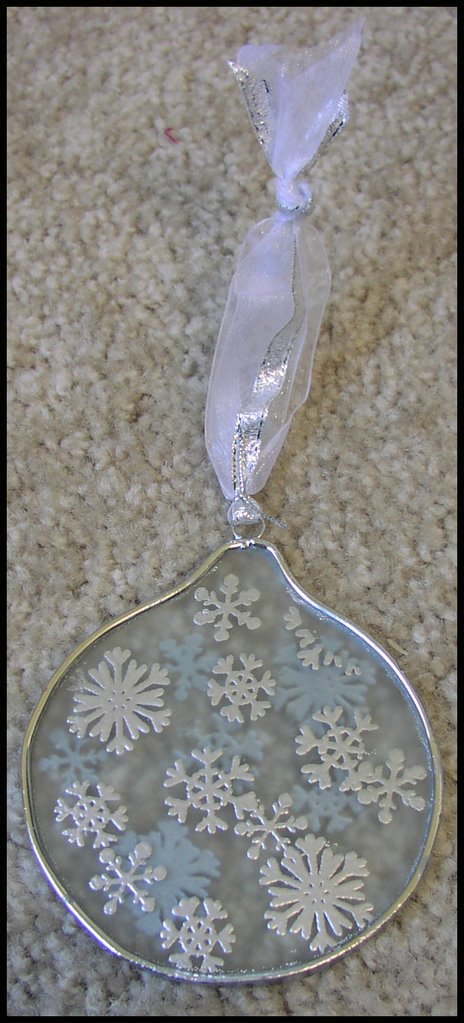 Talk about a pain in the patootie. This ornament gave me so much trouble. I had done glass etching before, but for some odd reason, it was not etching very smoothly this time. SO, I ended up etching the whole surface to get a more uniform look, and then embossing snowflakes in silver on the front and back. Then I added a white ribbon and silver ribbon on the top and it was done. I really hope Jody likes this one. It is sent with much love. It seriously was stressing me out bad. I had to walk away from it numerous times to keep from throwing it across the room. The ornament blanks came from Michael's and were fairly inexpensive. I plan to make more, I just hope that the etching cream works better. I will have to go on a search on SCS and see if there are any new tips for me on how to make it look more uniform. I hate being a perfectionist.
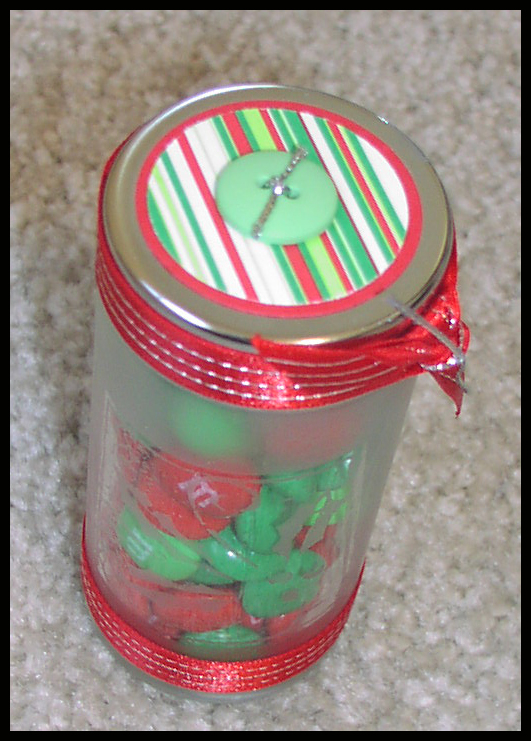
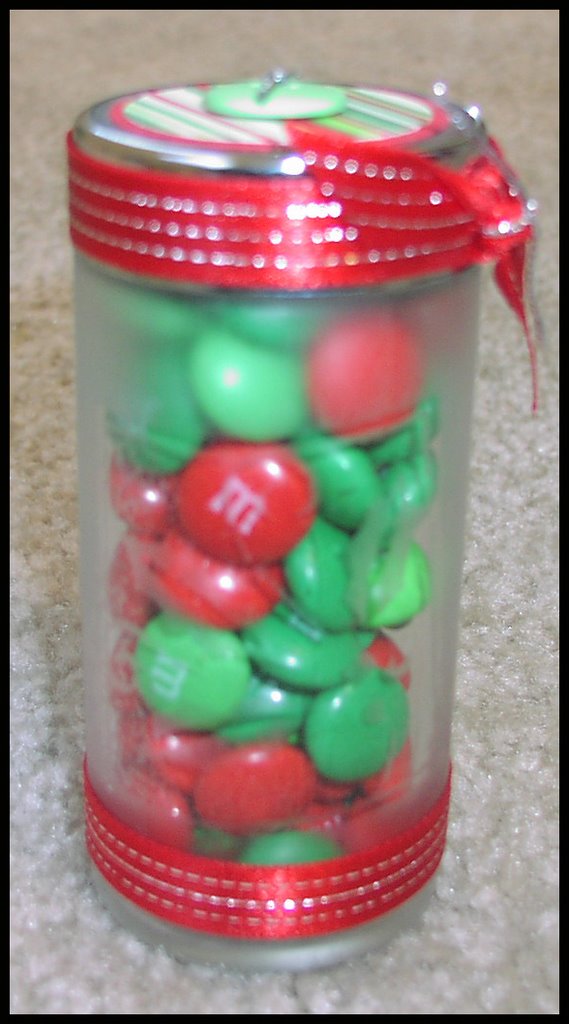 This container was just a spice jar that I managed to get on sale at Michael's one day. I thought it would look cute etched. I used the etching cream on this and it did etch smoother, not sure why. First I embossed the image from SU "Happiest of Holidays" and then put the cream on and let it sit, and then rinsed and scrubbed off the embossing powder with my fingernails (no small task considering - brace yourself, this is yucky la la - I bite my nails.) After the etching was done, I dressed it up a little with some paper and ribbon and added the M&M's. A yummy little christmas treat.
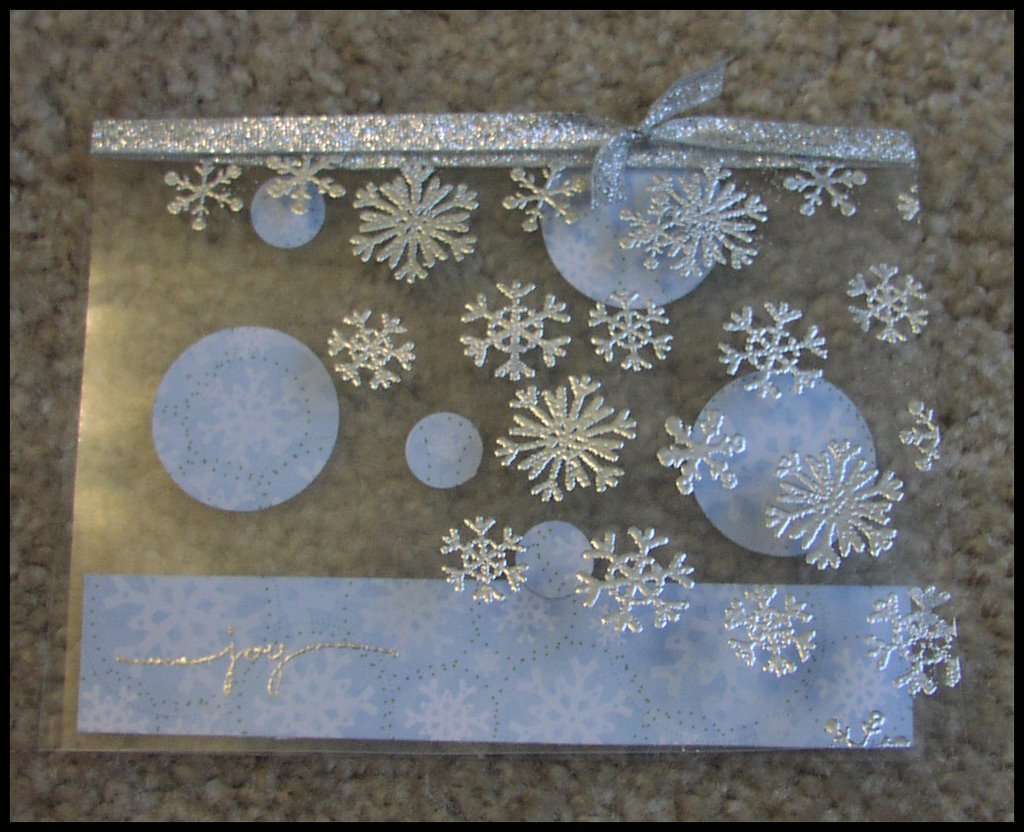 This grand finale was inkspired by all the cool clear cards I saw in the Christmas issue of papercrafts. I just had to try one for myself. I think it turned out cute, but I still am not sure if I like transparency cards because I am not sure where to write a message on them other than the sentiment.
I used SU designer series paper. I embossed the snowflakes (that stamp from Michael's again) in silver embossing powder. At first I was a little afraid of doing this -- scared the transparency would melt, but I had the right kind. I also worked fast to make sure it would be okay. I added silver ribbon across the top to perk it up!
I really hope Jody likes all the stuff I sent her. I also sent a little "spread love not cooties" hand wipe funny, and some emergen-C. Jody has been a little sick (understatement of the century) so I am hoping that will help her feel better.
Comments
Ditto on what kind of transparency you used!
~Kendra