 We were going to stop in Ft. Riley, KS to visit a friend, Sharon, but when I called her she did not reply. What I did not realize was that she had her wound from her c-section open after years and she was in the hospital at the time. I am sorry that we missed her.
I did not realize that Kansas City was so close to Independence. I kept driving looking for a hotel to stop at and suddenly I was in Independence. I was actually glad to be there since the area is really rich with church history sites, and I thought it would be a great place to stop. We stayed overnight, and in the morning went site seeing. First we went to the Independence Visitors Center. The kids had a lot of fun playing in the downstairs pioneer area made just for little kids. I was so thankful that they had this area and I am sure the sister missionary who was touring with us was thankful too, as when we went through a recreated pioneer bedroom, E decided to climb into the bed and sleep (embarassing as heck) and there was not a lot I could do to chase after her because I was keeping J from grabbing and touching stuff. Being a mom of two toddlers is hard work.
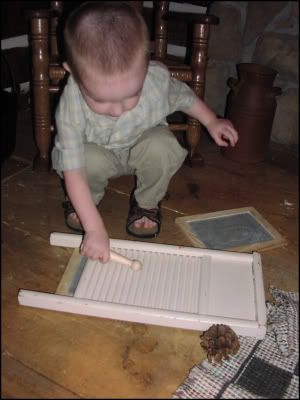
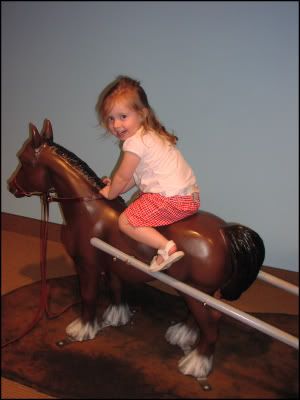
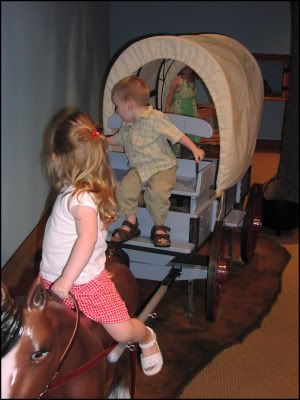
E and J enjoyed the covered wagon and horse (I love E's curls in this picture). J thought the fireplace inside of the little pioneer house was perfect to hide in - he just loves little crawl spaces. He is so funny! Miss E had fun playing on horseback as you can tell by the large grin on her face. J had a lot of fun trying out the old washboard, and making a lot of noise.
This was the building across the street from the visitors center. I thought it was really interesting looking and decided to take a picture. It turned out really gray and dark looking because the day was kind of overcast, which to me makes it look all sinister. It is called the Community of Christ Temple. A really neat looking and large building. I think the spiral up into the sky is pretty cool looking and I like all the windows on the spiral.
 stop. We stayed overnight, and in the morning went site seeing. First we went to the Independence Visitors Center. The kids had a lot of fun playing in the downstairs pioneer area made just for little kids. I was so thankful that they had this area and I am sure the sister missionary who was touring with us was thankful too, as when we went through a recreated pioneer bedroom, E decided to climb into the bed and sleep (embarassing as heck) and there was not a lot I could do to chase after her because I was keeping J from grabbing and touching stuff. Being a mom of two toddlers is hard work.
E and J enjoyed the covered wagon and horse (I love E's curls in this picture). J thought the fireplace inside of the little pioneer house was perfect to hide in - he just loves little crawl spaces. He is so funny! Miss E had fun playing on horseback as you can tell by the large grin on her face. J had a lot of fun trying out the old washboard, and making a lot of noise.
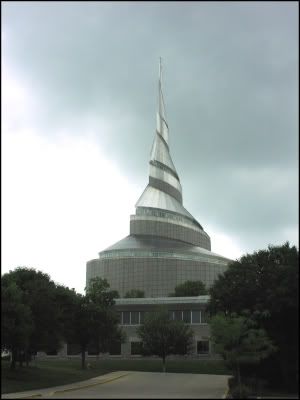
This was the building across the street from the visitors center. I thought it was really interesting looking and decided to take a picture. It turned out really gray and dark looking because the day was kind of overcast, which to me makes it look all sinister. It is called the Community of Christ Temple. A really neat looking and large building. I think the spiral up into the sky is pretty cool looking and I like all the windows on the spiral.
After the visitors center, we took the long scenic way to the liberty jail. We passed by some other smaller known historic sites on the way. We saw the grave marker commemorating the saints who died of cholera during Zion's Camp - June 1834. It was a very spiritual experience. When we got to Liberty Jail, the two kids were asleep, but we went in anyway and it was not long before they were awake and ready to party. The tour of the jail went mostly smoothly -- if you count me running around the jail display chasing E and J as smoothly! I was just thankful that it was a weekday and that there was only one other couple there, who were members and quite sympathetic and helpful. It was very interesting and my favorite thing that was said was that
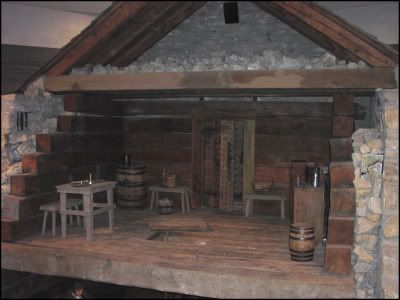
"while the prophet was there it was more like a temple than a prison"I also enjoyed hearing the history of the walls of the jail. Very interesting all in all. This is the upstairs of the Liberty Jail, the hole in the floor leads to the short jail (meaning short in height -- too short for the prophet to stand up in -- that would have been hard to live like that - nevermind to still be in tune and receive scripture.)
Comments